v14.0ATX 2014
Selecting States for 1040 Product After Installation
Upon installing your ATX 1040 Product, there was an opportunity to select which states you'd like to install (up to 3) during the Activation of your 1040 software. If, for whatever reason, you did not select the 3 included states when you installed the 1040 Product, it can easily be done after installation.
To select states for 1040 Product after installation:
- From the Return Manager or an open return, click the Support menu; then, expand the Customer Service Utilities fly-out menu and select Select States.

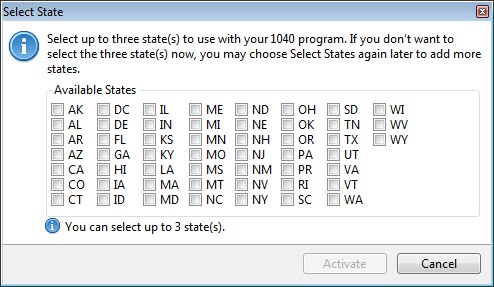
ATX 1040 Select State dialog box
- Select the check box(es) next to the state(s) you wish to add (you may select up to 3).
- Click Activate.

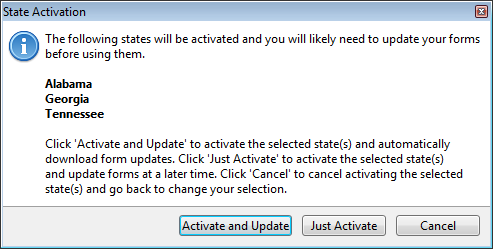
ATX 1040 State Activation dialog box
- Do one of the following:
- Click the Activate and Update button to activate the selected states and update forms immediately.
- Click the Just Activate button to activate the selected states and update forms at a later time.
- Click the Cancel button to return to the Select State dialog box.
Forms for the state(s) selected will not be available until forms have been updated.